Snowed In Yarn Stash Busting Part 2: Crochet Face Scrubbies

In my previous post, I wrote about using left over yarn skeins to make kitchen sponges. I decided I needed a second project to end some other partial skeins. It was a long storm.

I usually use washcloths to wash my face. Only occasionally will I use the little round cotton scrubbies you can buy at the drug store. The problems with washcloths are:

  1. We don’t have a whole lot for the bathroom and are not planning on updating our bath linens for a while
  2. A bunch of washcloths take up a decent amount of real estate in the washer

I found this tutorial for crocheted face scrubbies at All Parenting and it was SO easy. It’s a really good tutorial with step by step pictures and easy to understand directions. She also used yarn that was easier to see the stitches than I did. Blogger fail on my part. They came together super fast. I made 20 in no time at all.

I used a size F need and just general Red Heart yarn from my stash. However, if you’re buying yarn for this or have some super soft warn laying around I’d use that instead. They’re a bit more of an exfoliator with the yarn that I used which is great, but for eye-makeup it’s a bit too rough for me. My hope is they’ll soften up after a few washes.

  1. Start by chaining 4

20160127_173027

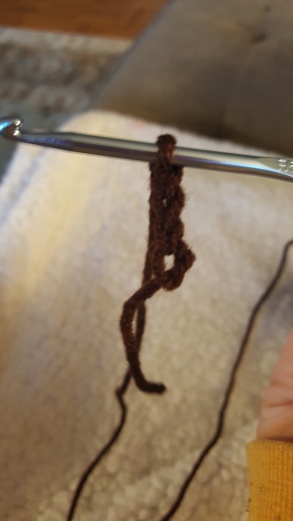
2. Use a slip stitch to join the ends and make a small circle.

20160127_173115

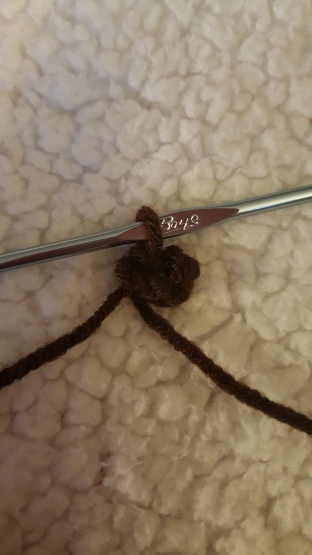
3. Single stitch 8 times into and around the circle. Join the first and last stitch in the circle with a slip stitch and then stitch 2.

20160127_173301

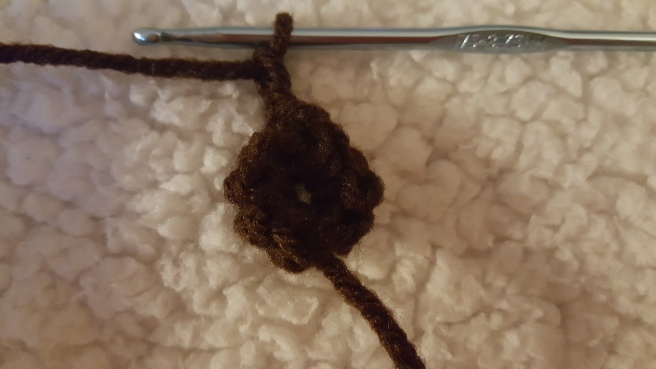
4. Double stitch twice in each single stitch (for a total of 16 double stitches)

20160127_173234

5. Join the first and last stitches with a slip stitch and chain 1. Then single chain into each double stitch.

6. join the first and last stitches with a slip stitch and again, chain 2. Then double stitch in each single stitch twice. Join the first and last stitches with a single stitch to secure the circle together.

20160127_183343

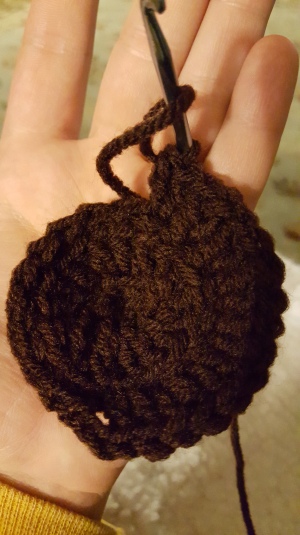
7. Snip the yarn and pull it through the final stitch to secure.

20160128_161033

8. Use an upholstery needle to weave the starting and ending tail into the scrubbie. Snip any extra.

This is the front and back of the resulting round scrubbie.

I am storing mine in a glass jar (check out my post on how to get wax out of used up candles to see where I get all my glass jars from). They’ll ultimately live in my vanity mirror.


Snowed In Yarn Stash Busting Part 1: Crochet Dish Sponges

We got a solid blizzard last weekend. As soon as the first flakes started to fall my fingers started itching for a crochet hook. Unfortunately, I was ill prepared and so just had some random skeins I hadn’t yet used up. So, I got on Pinterest for some ideas to bust my stash. I found this awesome idea for crocheted kitchen sponges from Book People Studios.

Background: I HATE sponges. Despise sponges. I use rags for dishes because after using a sponge once I’m convinced it’s full of gross stuff in all the crevices and it squeams me out. I know they can be microwaved or put in the dishwasher. I don’t care. I hate them.

So these crochet sponges made me super excited.

  1. I can put them in the washing machine with my towels
  2. They take up minimal space
  3. I quickly made up a set so I can use a new one EVERY DAY!


This tutorial was a bit more fancy than the ones I made. I wasn’t sure if we were going to lose power so once I got the gist of the basic part, I just carried that through the whole sponge. That way I didn’t keep having to pull it up on my phone. It worked swimmingly.

*Note: I used a size F hook, for reference*

  1. Chain 13 and turn
  2. Single chain in each of the 12 empty stitches left.
  3. Chain one and turn.
  4. I did steps 2-3 for all my rows.
  5. Crochet 50 rows. This got to be a pain to count so i started using random things, like hair pins, to mark every 10 rows. Eventually I got smart and used safety pins to mark every 10 rows. I’d recommend safety pins.

6. After row 50 I changed colors.

7. I did another 25 rows in color 2.

8. Once I had stitched all 75 rows, I left my needle in the last stitch and I used an upholstery needle to weave all my other yarn ends in. Don’t end that last piece quite yet.

9. Next, trifold the long strip. I folded the starting edge up to where I changed colors, then folded the last 25 stitches over the top. It should now be sponge shape and size. I used some straight pins to hold things together and in place

20160122_185442

10. Single stitch all around the sponge, making sure your needle goes through all 3 layers. Once you get all the way around, join the last edge stitch to the first with a single stitch. Once you cut the string, weave the ends in with an upholstery needle.

11. I made 6 to bust out my stash and store them on my sink. I pull a new one each day and throw any dirty ones in the washing machine for my next load of towels.

20160127_172713

20160122_192201