500th Visitor Giveaway Winner!

Last week I posted that in celebration of reaching 500 visitors, I was going to raffle off two handmade potholders to one of my followers.

image

I took out friends and family (sorry guys) and entered the rest of my AWESOME followers in a random picker website.

image

And the winner is (drumroll please!)…

image

@daniellajoe!
Daniellajoe, I’ve emailed you, but if you haven’t gotten the message please let me know.

If you haven’t checked out Daniellajoe’s blog (www.daniellajoe.com) you should. Go do it right now!

I have a new project I’m posting next week. The Boyfriend and I got to do some free canvas painting this weekend and I didn’t quite get the other post together.

image

image

image

Thank you for your visits, your likes, your follows. I appreciate you stopping by!

Celebrating 500 Views & A Giveaway!

My little budding baby blog has 500 views!

To thank you all and celebrate, SensibleSchemes is doing a giveaway. I’m giving away 2 handmade potholders that I know will look awesome in your kitchen.

20160428_191830

How do you enter? Easy!

  1. Follow my blog by Friday May 6, 2016

Thats it! I’ll randomly choose a winner from my followers and announce it in my next post.

Thanks guys!


SensibleSchemes Unpacks: Seagrove, North Carolina

There’s  a magical place in North Carolina where the whole town just spends their time making things. Seagrove, North Carolina boasts a population of 230 people. Believe it or not, it also has at least 60 pottery shops/galleries. My visit this past weekend had the potential to bankrupt me. My plan was to only buy things I could actually use on a regular basis. I saw hundreds (literally) of gorgeous mugs, but I have a ton of mugs. So I kept my budget and added to my kitchen by sticking to things I would use weekly, if not daily.

Purchase 1: Pitcher

I bought this at one of the first shops we went to. I saw this and was smitten. It’s from Whynot Pottery. Literally, the first thing I did when I got home was wash it and fill it with sliced lemons and limes, ice, and water. Pretty sure water tastes better simply being poured from it. I need to have people over now just to batch of sangria or cocktails in it.

Purchase 2: Olive Oil Dispenser

I’d been looking for one of these for a while and the glaze on this dispenser from Keith Martindale Pottery was too much to resist. It almost looks like dripped wax. Keith himself gave us a demo at his wheel. This shop also had the most amazing carved pottery. As if the truly beautiful glazes weren’t enough, there are cabins and landscapes carved directly into the vases and pitches.

Purchase 3: Honey Pot

This was the other thing I knew going in I wanted to find. A lot of shops had honey pots,  but I just wasn’t finding the right glaze and colors. I did a lot of oohing and aaahing at this shop, O’Quinn. I literally loved everything in this shop. It’s a miracle I walked out with only one thing. This and the pitcher and currently duking it out for “favorite purchase”.

Purchase 4:Ornament

20160417_173213

I’m trying to slowly grow our Christmas ornament collection by picking up ornaments that represent experiences and trips shared or have some sort of personal meaning. When we decorate the tree, I want to have stories for my ornaments. Even if that means we only have a few for quite a while. Kovack Pottery had the most giant assortment of ornament of Christmas ornaments. They very thoughtfully stamped the year on the back.


A once a year pilgrimage may be in order. I already have a “next time..” list.

Recipe Collection Pockets

Pinterest makes sharing individual recipes so easy. But what about a recipe collection? Recently for a gift I wanted to share a batch of sangria recipes. I had gotten S.C. a beautiful sangria pitcher, but the gift felt incomplete.

I had a batch up sangria recipes I had gotten from a class at a local resraurant (because of this, I can’t post the actual recipes here). I wanted to gift her the recipes with the pitcher but wasn’t sure how to do it in a more fun way than an email attachment.

I wrote out each recipe indvidually on a piece of scrapbook paper. There isn’t a standard size for the recipes, I wanted them to be varietions on a size.

To hold the recipes, I picked out a large piece of scrapbooking paper. I think it’s about 16 inches by 10 inches.


  1. Fold the construction paper in half with a hard crease
    20160401_191046
  2.  Fold up the bottom edge approximately 4-5 inches. This will be your pocket that will hold the recipes. Crease hard.
  3.  Fold over each side each approximately 1/2 inch. Crease hard.
    20160401_191337
  4.  On the pocket, snip out the piece of paper that was creased over. This will reduce bulk when gluing and also give you a cleaner finish.
    20160401_191413
  5. Choose your glue. I used rubber cement because it was handy. Then I used binder clips to apply pressure to hold the edges of the heavy paper together until the glue dried. Once dry, remove the binder clips.
    20160401_191752
  6.  Once the glue is dry, stash your recipes in the pockets. If you used different sized paper, put the tallest recipes in the back.

    You could decorate the front, if you wanted. I left it undecorated and used it as the card that went with the gift.

Test Bar: Dutch’s Spirits DIY Cocktail Bitters

I’ve been wanting to start dabbling in making bitters. Bitters are glorious little cocktail additions. Just a few drops polish a drink and take from okay to amazing. Bitters all but disappeared in the United States during/after prohibition. They’re experiencing a sort of renaissance at the moment. A super delicious renaissance. My love of the properly bitterly adorned cocktail has put “become a bitter mad scientist” on my long term to-do list. So, I was super excited when The Boyfriend got me this bitter making kit for Christmas.

This particular kit, Dutch’s Spirits DIY Cocktail Bitters Kit was purchased from Williams & Sonoma.

What’s inside this adorable little jar? I’ll show you!

wp-1458403613407.jpg

  • 750 ml glass jar
  • (2) 1 ounce bitters bottles with droppers
  • Small funnel
  • Infuser ball
  • Printed and blank labels
  • 2 botanical packets (aromatic & citrus ginger)
  • 2 small bittering agent packets
  • Note: Supply your own vodka

After giving everything a good scrub, I put the citrus ginger botanical packet in the infuser ball. I put it in the bottom of the glass jar and put in an entire 750 ml bottle of vodka. Make sure to hold on the empty vodka bottle and cap. You’ll need it.

Then I latched the jar shut and put in cabinet in the bar. Apparently bitters like it cool and dark.

The directions said to leave the botanicals infusin’ for between 10 and 20 days. I let it infuse for the full 20. Every day the jar got a some attention when I swirled it for about 30 seconds.

After 20 days. I took out the infuser ball and threw out the botanicals.

Next the infuser ball was filled with a bittering agent packet. I put that back in the jar, closed the lid, and returned the jar to its dark little home. The directions recommended allow this process to happen over 4-8 days. I did the full 8, swirling each day.

Then, the infuser ball came out for one final time.


I carefully funneled the bitters into one of the bottles.

Then I relaized i had an INSANE amount – essentially a full vodka bottle – left. I crossed my fingers these were realllllly good bitters.

Tasting: they were..okay. Palatable? I have citrus bitters I greatly prefer (Angostura, Embitterment, Hella Bitter), but it’s a starting point. I’ll definitely be exploring off-kit to see how what I can concoct; different vodkas, different flavors, different infusing times. In the meantime, if anyone wants some mediocre citrus bitters, I have 750 ml I’m happy to share…

Kitchen Kitsch: Family Geography Tea Towel

I’m a sucker for sentimental kitsch. I’m slowly coming to acceptance that I will never have Pinterest-worthy, clutter free existence. Don’t get me wrong, i’m all about organizing, but there’s just so many cool things that (as the cool kids say) bring me joy.

What brings me joy, however, is the interaction. The get-togethers my ice bucket shaped like an old timey diving helmet remind me up, the feeling I get when selecting thread out of my little old bright blue sewing table that I cut my furniture painting teeth on, the frame above my desk/sewing table that holds the first ever check I made consulting that proved to myself my career is my own…

I’m a hopeless sentimentalist.

I was at my parents’ over Christmas and Pops, The Boyfriend, and I toured our local brewery (shout out to Schells Brewery ). While I got a Red Wing beater bowl (that is used daily, seriously another thing I got weirdly attached to) and The Boyfriend got a souvenir t-shirt, I saw the kitschy-est tea towel ever by Primitives by Kathy.

20160109_111038

Of course I bought it.

I have a whole bunch of siblings and I thought it might be neat to embroider where everyone is/has lived, send to my Mom in Minnesota, and update it as necessary.

Home base is a gold yellow star. Everyone else is assigned a color and gets a tiny star.

As the black sheep of the family, I’m not in Minnesota. I put myself – the places I’ve lived – with a dotted line connecting both.

20160308_165944

Lastly, I used the original yellow/gold color to fill in the family name and the established date (cute, right?)

Lastly, I recorded the colors I used for each person on a card and put it in my embroidery thread box for future updates.

20160308_170444

What will the map look in 3 years? 5 years? 10 years? If it holds up, it could be a pretty neat keepsake. See? hopeless sentimentalist.


The Coziest & Quickest Baby Afghan You’ll Ever Meet

This post begins with an apology. An apology to every friend who I’ve said “I’m making  you a baby blanket” when they found out they were expecting – and then said blanket was never finished. MK: Your blanket had coffee spilled on it during a move after months of working on it. LJ: Started and abandoned after I realized the baby was no longer a baby. SJ: Consider yourself lucky. Until now, your the blanket I gave your baby is the only one I ever successfully finished. So, apologies all around. The days of blanket failure are over, I’ve found a pattern that is nothing short of magic.

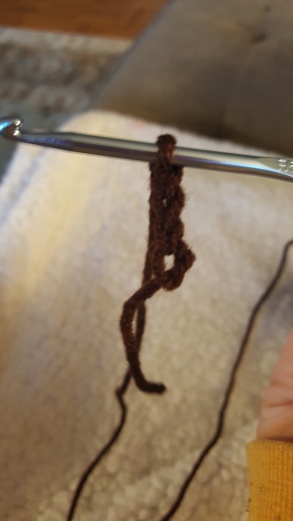
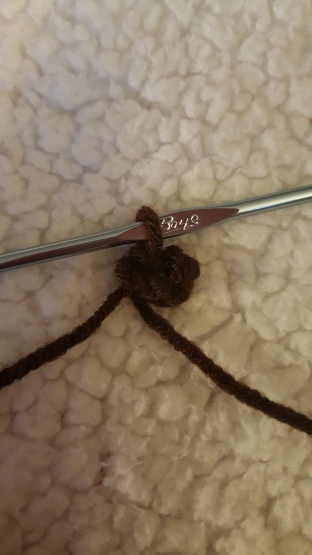
The tutorial is SO good, I don’t think I can do it justice, so I’m just going to link to it here. Chucks for Chancho breaks it down so well even I could follow it with no problem. And I usually end up confused somewhere in a crochet tutorial. It really is awesome.

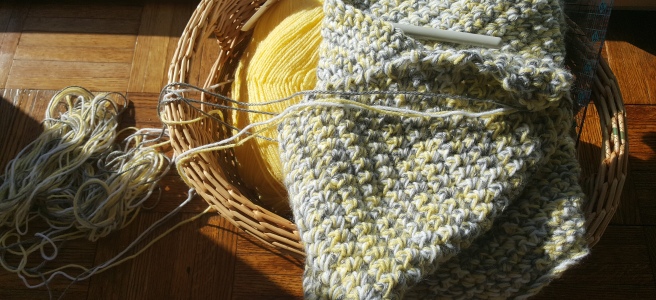
I had wanted a unisex green/gray/cream blanket, but I could only find yellow in the Pound of Love that was on sale. So, I ended up making the exact same blanket as is featured on Chucks for Chancho. Proof the tutorial works!

I hit a yarn sale and got some discounted baby yarn. Ideally, I would have found 1 Pound of Love in each color, I could only find the gray in a smaller size. For reference, my blanket ended up being 3 1/2 feet by 3 1/2 feet-ish. 20160216_101644


  • Color A: 1 Lion Brand Pound of Love
  • Color B: 1 Lion Brand Pound of Love
  • Color C: 4 Skeins baby yarn (I used Caron Simply Soft)

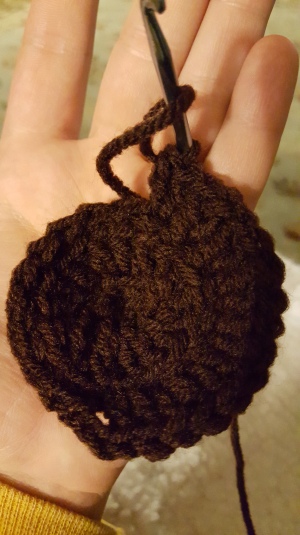
This blanket is so quick. Seriously. I finished it in 2 weeks working only on it before bed at night/weekend afternoons. And I did skip some days. The trick? It uses three strands at once. The result is a super chunky, super soft, super awesome baby blanket. I may make one in a larger size for the living room.

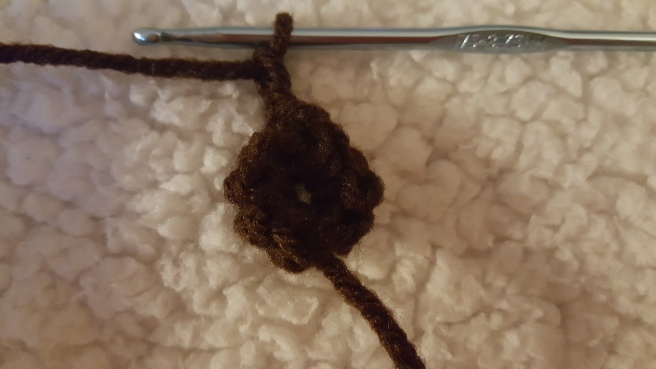
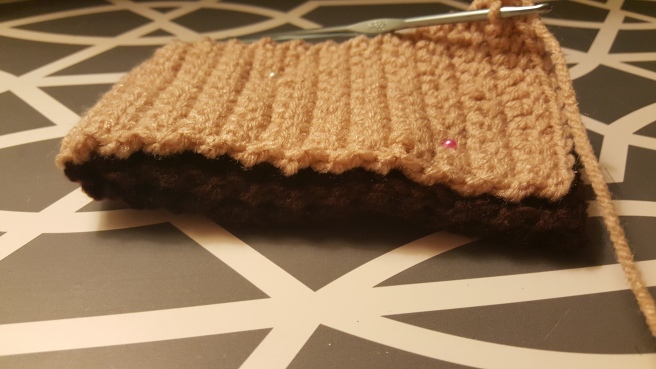
That’s it. Just single stitch each row. It builds up very quickly. The top left corner picture is after working a couple hours.

When I was happy with the size, I used my trusty darning needle to weave in any ends at the start/end of the blanket and any where I tied in a new skein of gray.

Here are some finished project pictures.

For the mama to be, I used some left over yarn and scrap booking paper to create a label and tie into a little bundle.

Again, I know this isn’t exactly a tutorial, but that’s because it’s already been done so well. For the detailed, not-even-I-can-mess-this-up instructions check out Chucks for Chancho.

Future mama’s to be: I’ll be looking for all sorts of excuses to make this again!

DIY: Baby Burp Cloths

I get so excited when people I know announce pregnancies. It means I get to do some baby crafting!

These burp cloths are so dreamy. Flannel on one side is super soft for sensitive baby skin. Terry cloth on the other is not only also very soft but very absorbent. A burp cloth that isn’t absorbent is just a problem.

For 2 burp cloths, I used:

  • 1/4 yard flannel in an adorable baby print
  • 1/4 yard terry cloth in a color that compliments/contrasts (you do you!)
  • Coordinating thread

After washing, drying, and ironing all the fabric, I created a 10 x 18 inch rectangle on the wrong side of the flannel. I wanted some room for error since this was my first try, so I also traced an inch around on all sides and cut on those lines.

I pinned each rectangle to the terry cloth (wrong side out) and cut the terry cloth to match the size.

To make my corners nice after sewing, I cut off each corner just outside my sew line.


Keeping the layers pinned together, I sewed around the entire rectangle on my sew line. I left a 2 inch opening between my first stitch and my last stitch to pull the fabric right side out.


Pull the fabric right side out.

20160227_093702 - Copy

Using your coordinating thread, sew a 1/4 inch edge all around the burp cloth. Ensure that your open edge gets securely closed when you do this (this is where the 1 inch over hang helps – you can ensure that your top stitching catches all the layers it needs to).

20160227_095545 - Copy

I finished by trimming the ends of my threads (see top right corner picture below) and taking a lint brush to the fabric, folding, and tying into a neat little package to send to the mommy-to-be!


Snowed In Yarn Stash Busting Part 2: Crochet Face Scrubbies

In my previous post, I wrote about using left over yarn skeins to make kitchen sponges. I decided I needed a second project to end some other partial skeins. It was a long storm.

I usually use washcloths to wash my face. Only occasionally will I use the little round cotton scrubbies you can buy at the drug store. The problems with washcloths are:

  1. We don’t have a whole lot for the bathroom and are not planning on updating our bath linens for a while
  2. A bunch of washcloths take up a decent amount of real estate in the washer

I found this tutorial for crocheted face scrubbies at All Parenting and it was SO easy. It’s a really good tutorial with step by step pictures and easy to understand directions. She also used yarn that was easier to see the stitches than I did. Blogger fail on my part. They came together super fast. I made 20 in no time at all.

I used a size F need and just general Red Heart yarn from my stash. However, if you’re buying yarn for this or have some super soft warn laying around I’d use that instead. They’re a bit more of an exfoliator with the yarn that I used which is great, but for eye-makeup it’s a bit too rough for me. My hope is they’ll soften up after a few washes.

  1. Start by chaining 4

20160127_173027

2. Use a slip stitch to join the ends and make a small circle.

20160127_173115

3. Single stitch 8 times into and around the circle. Join the first and last stitch in the circle with a slip stitch and then stitch 2.

20160127_173301

4. Double stitch twice in each single stitch (for a total of 16 double stitches)

20160127_173234

5. Join the first and last stitches with a slip stitch and chain 1. Then single chain into each double stitch.

6. join the first and last stitches with a slip stitch and again, chain 2. Then double stitch in each single stitch twice. Join the first and last stitches with a single stitch to secure the circle together.

20160127_183343

7. Snip the yarn and pull it through the final stitch to secure.

20160128_161033

8. Use an upholstery needle to weave the starting and ending tail into the scrubbie. Snip any extra.

This is the front and back of the resulting round scrubbie.

I am storing mine in a glass jar (check out my post on how to get wax out of used up candles to see where I get all my glass jars from). They’ll ultimately live in my vanity mirror.


Snowed In Yarn Stash Busting Part 1: Crochet Dish Sponges

We got a solid blizzard last weekend. As soon as the first flakes started to fall my fingers started itching for a crochet hook. Unfortunately, I was ill prepared and so just had some random skeins I hadn’t yet used up. So, I got on Pinterest for some ideas to bust my stash. I found this awesome idea for crocheted kitchen sponges from Book People Studios.

Background: I HATE sponges. Despise sponges. I use rags for dishes because after using a sponge once I’m convinced it’s full of gross stuff in all the crevices and it squeams me out. I know they can be microwaved or put in the dishwasher. I don’t care. I hate them.

So these crochet sponges made me super excited.

  1. I can put them in the washing machine with my towels
  2. They take up minimal space
  3. I quickly made up a set so I can use a new one EVERY DAY!


This tutorial was a bit more fancy than the ones I made. I wasn’t sure if we were going to lose power so once I got the gist of the basic part, I just carried that through the whole sponge. That way I didn’t keep having to pull it up on my phone. It worked swimmingly.

*Note: I used a size F hook, for reference*

  1. Chain 13 and turn
  2. Single chain in each of the 12 empty stitches left.
  3. Chain one and turn.
  4. I did steps 2-3 for all my rows.
  5. Crochet 50 rows. This got to be a pain to count so i started using random things, like hair pins, to mark every 10 rows. Eventually I got smart and used safety pins to mark every 10 rows. I’d recommend safety pins.

6. After row 50 I changed colors.

7. I did another 25 rows in color 2.

8. Once I had stitched all 75 rows, I left my needle in the last stitch and I used an upholstery needle to weave all my other yarn ends in. Don’t end that last piece quite yet.

9. Next, trifold the long strip. I folded the starting edge up to where I changed colors, then folded the last 25 stitches over the top. It should now be sponge shape and size. I used some straight pins to hold things together and in place

20160122_185442

10. Single stitch all around the sponge, making sure your needle goes through all 3 layers. Once you get all the way around, join the last edge stitch to the first with a single stitch. Once you cut the string, weave the ends in with an upholstery needle.

11. I made 6 to bust out my stash and store them on my sink. I pull a new one each day and throw any dirty ones in the washing machine for my next load of towels.

20160127_172713

20160122_192201